Install Nvidia CUDA for your laptop to make sure your graphic cards can be used to run the LLM
I assume you are using a Ubuntu 26.04 machine. The instructions are based on this post
Check if your laptop has a Nvidia graphics card with this command.
lspci | grep -i nvidiaYou should see something like this:
01:00.0 3D controller: NVIDIA Corporation TU117GLM [T600 Laptop GPU] (rev a1)
Install the Nvidia toolkit with the following command.
sudo apt install nvidia-cuda-toolkitUse this command to check which is the recommended driver for your graphics card.
sudo ubuntu-drivers devicesBefore installing the driver. Check if you already have any nvidia driver installed. If so, remove them, so that you can install a fresh new driver
sudo apt purge nvidia-*Install the recommended device, replacing xxx with the right version.
sudo apt-get install nvidia-driver-xxxVerify the installation with this command:
nvidia-smi
Install Jan.ai to run a local LLM
Download and install Jan.ai model manager. For Ubuntu machines remember to download the .deb version as I have had issue with the Flatpak version.
When you open Jan.ai you might get this notification.
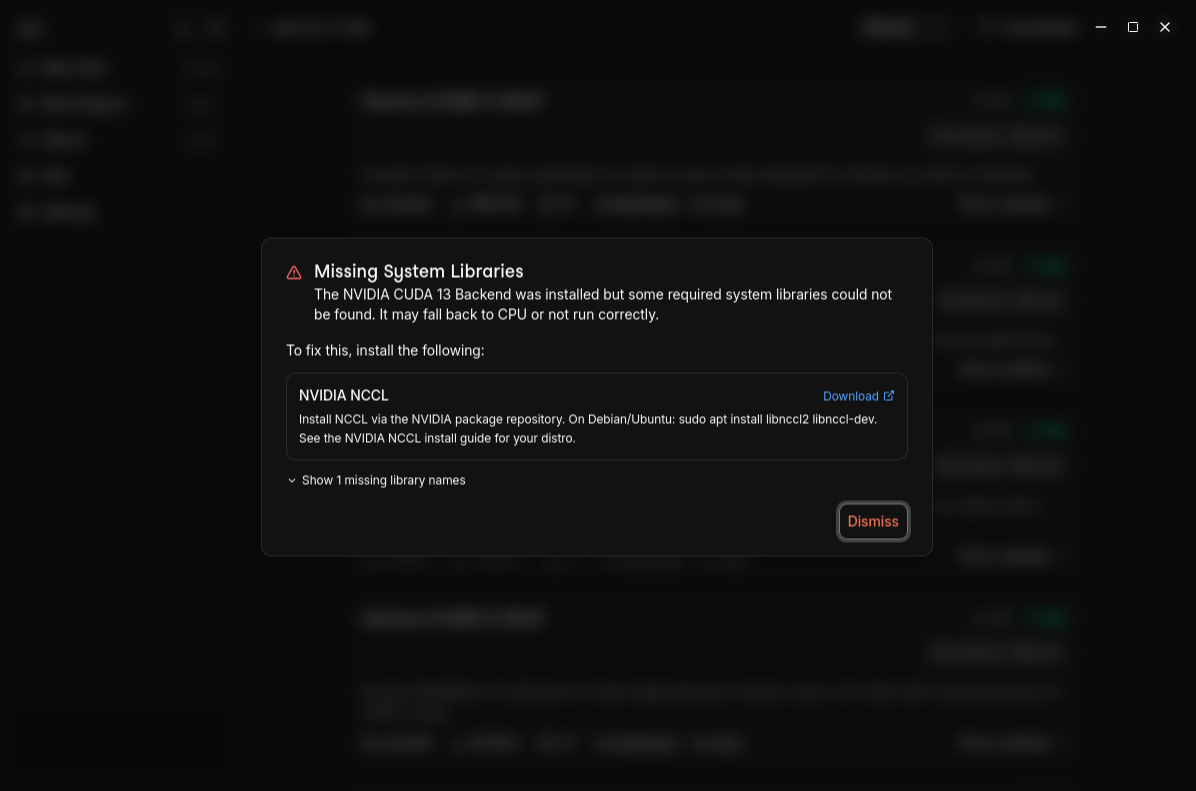
follow the recommendation and install the libraries
sudo apt install libnccl2 libnccl-dev
Once installed, open Jan. Go to Settings -> Hardware and check that your GPUs are detected.
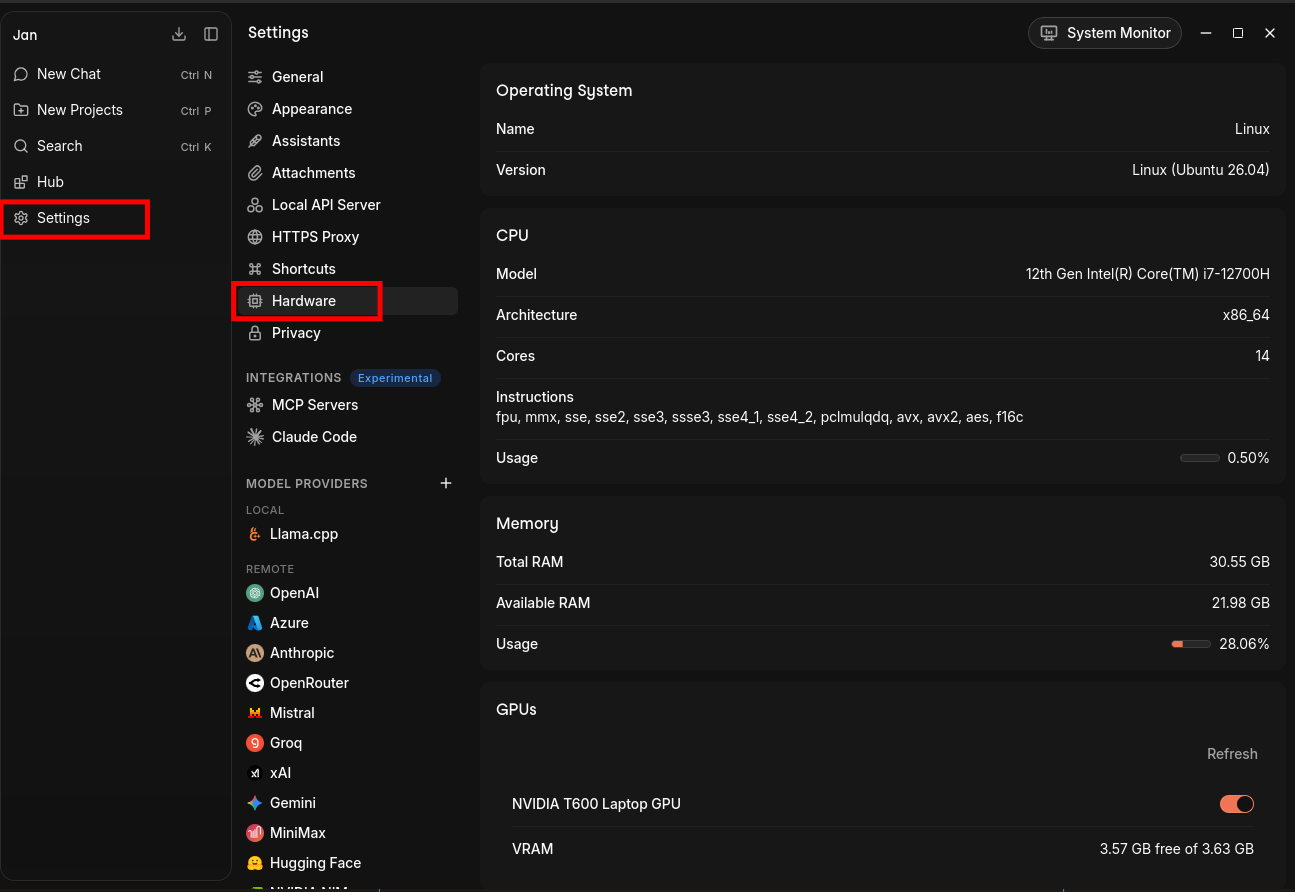
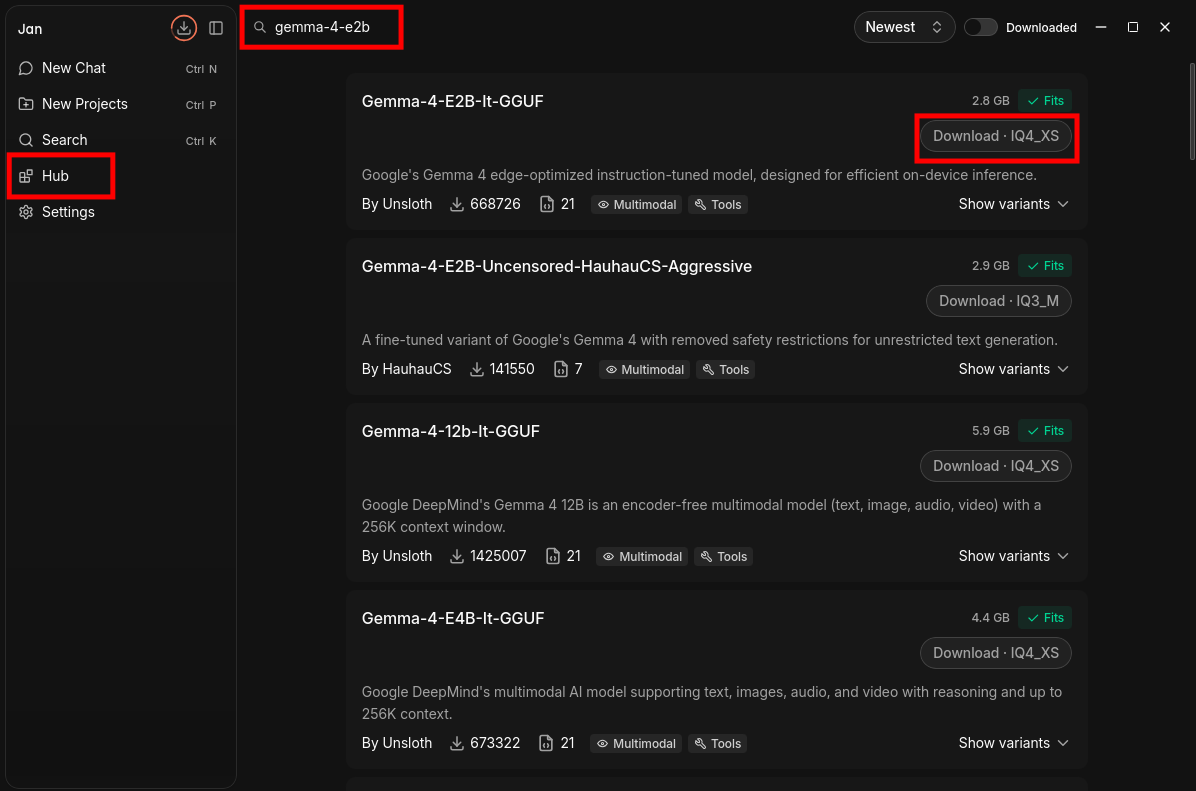
If everything is working right. Lets got to Hub -> search for ‘gemma-4-e2b’. Download the ‘Gemma-4-E2B-it-GGUF’ model. The model is about 2.8GB the download will take some time.
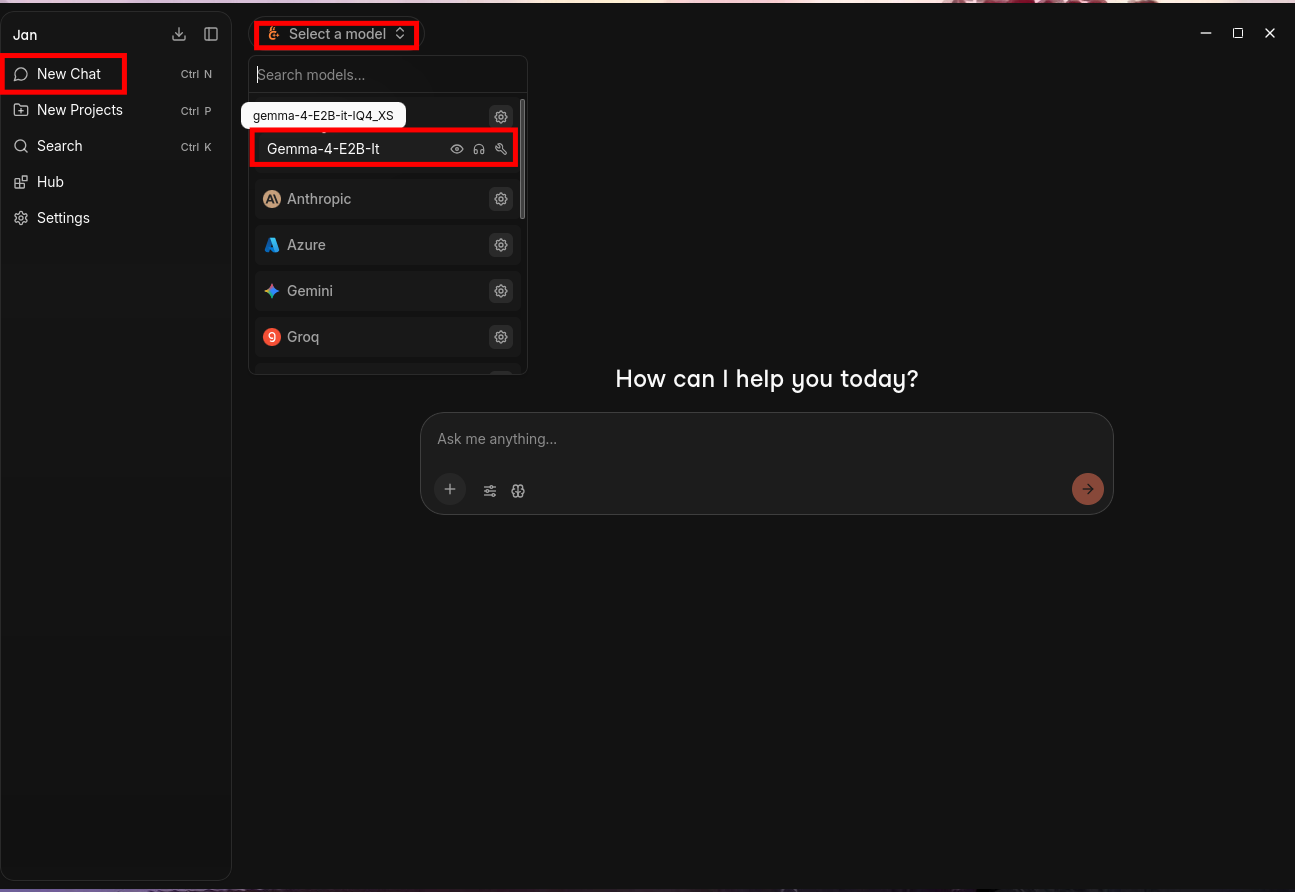
Once the download is complete. You can chat with the model by going to New Chat -> Select a model -> Gemma-4-E2B-it
You can configure your model by going to Settings -> Llama.cpp -> gear icon. In the configuration window go to Context Size and change the value to 32768. You will need this value to integrate it with copilot.
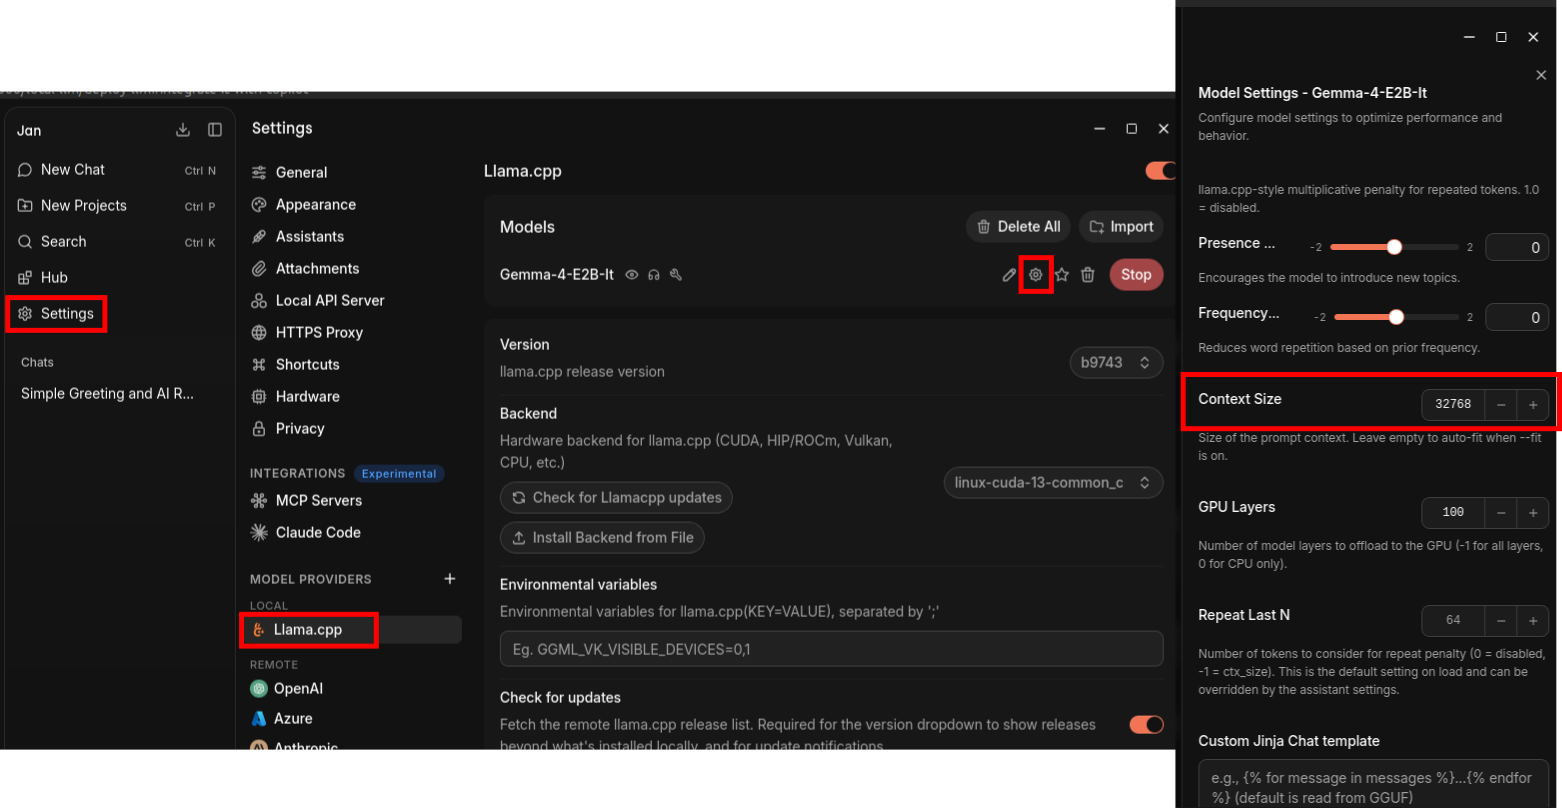
Congrats you have successfully download and run a local LLM.
Integrate with Pi Coding Agent
Install Pi coding agent here
Configure the custom model file. Create a in ~/.pi/agent/models.json Link
Configure the file as follows
{
    "providers": {
        "janai": {
            "baseUrl": "http://127.0.0.1:1337/v1",
            "api": "openai-completions",
            "apiKey": "anything",
            "models": [
                    {
                        "id": "gemma-4-E2B-it-IQ4_XS",
                        "name": "Gemma-4-E2B",
                        "reasoning": true,
                        "input": ["text", "image"],
                        "contextWindow": 128000,
                        "maxTokens": 16000
                    }
            ]
        }
    }
}
Once configured go to the terminal, go to the directory and activate pi. Refer to quickstart guide here
cd path/to/the/directory/you/want/to/work/in
pi
In the terminal type in ‘/model’ to select the model you have just configured. Chat with the agent and build your project.
Integrate it with copilot.
The conventional way to use copilot is you will need to login to your github account. In this tutorial, I manually integrate the local model and did not login to my github account.
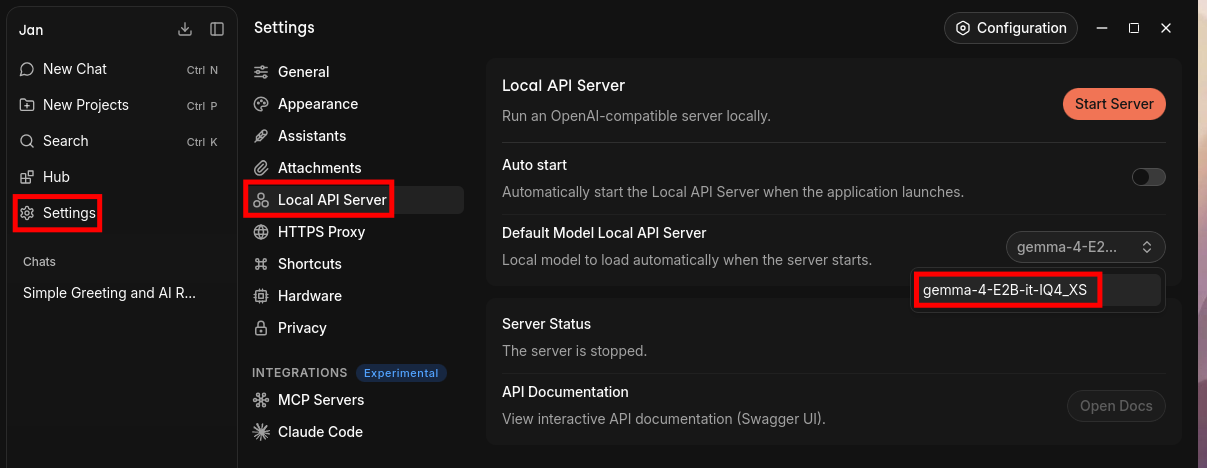
Run a server to serve the local llm. Open Jan, go to Settings -> Local API Server. Choose the ‘gemma-4-E2B-it-IQ4_XS’ and click on ‘Start Server’.
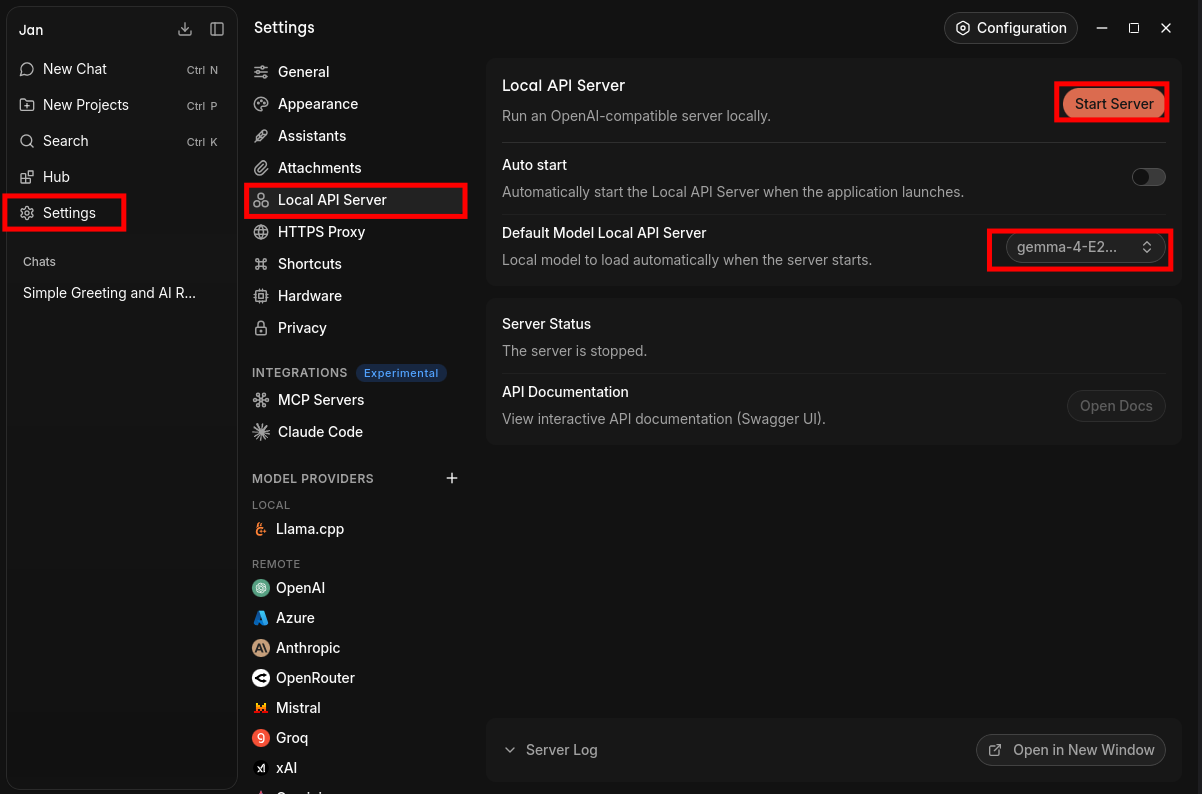
Download vscode here
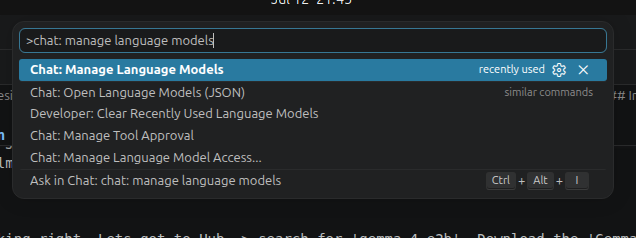
Search (Ctrl + Shift + p) for ‘>chat:manage language model’. Click on it.
In the manage language model window click on Add Models -> Custom Endpoint
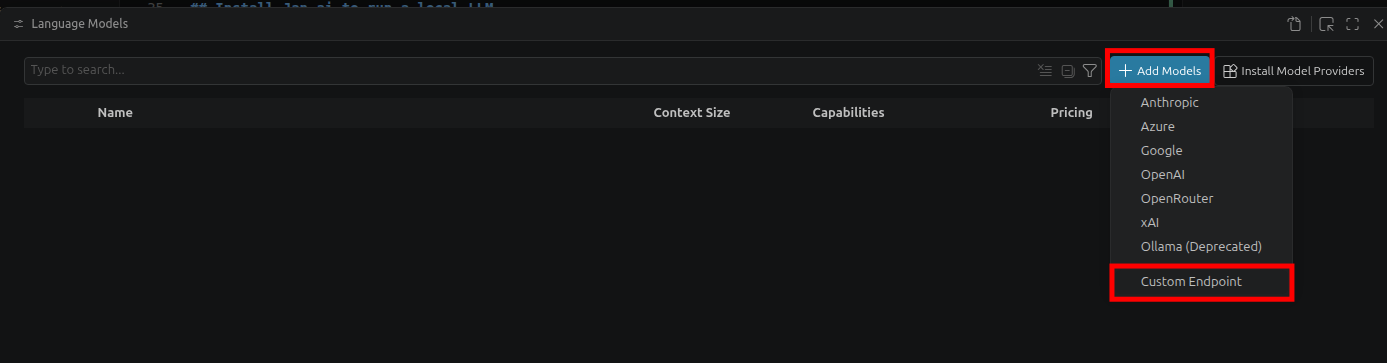
Once you click on it vscode will ask you a few questions. Answer as follows:
Group Name: LocalJan
API Key: anything
Custom Endpoint: API Type: Chat Completions
A text window will open for you to configure your model. Co nfigure your model as follows:
[
    {
        "name": "Local Jan",
        "vendor": "customendpoint",
        "apiKey": "${input:chat.lm.secret.47fc6855}",
        "apiType": "chat-completions",
        "models": [
            {
                "id": "gemma-4-E2B-it-IQ4_XS",
                "name": "Gemma 4 E2B",
                "url": "http://127.0.0.1:1337/v1",
                "toolCalling": true,
                "vision": true,
                "maxInputTokens": 32768,
                "maxOutputTokens": 16000
            }
        ]
    }
]
the id needs to be id shown on on the Jan -> Settings -> Local API Server -> Default Model Local API Server
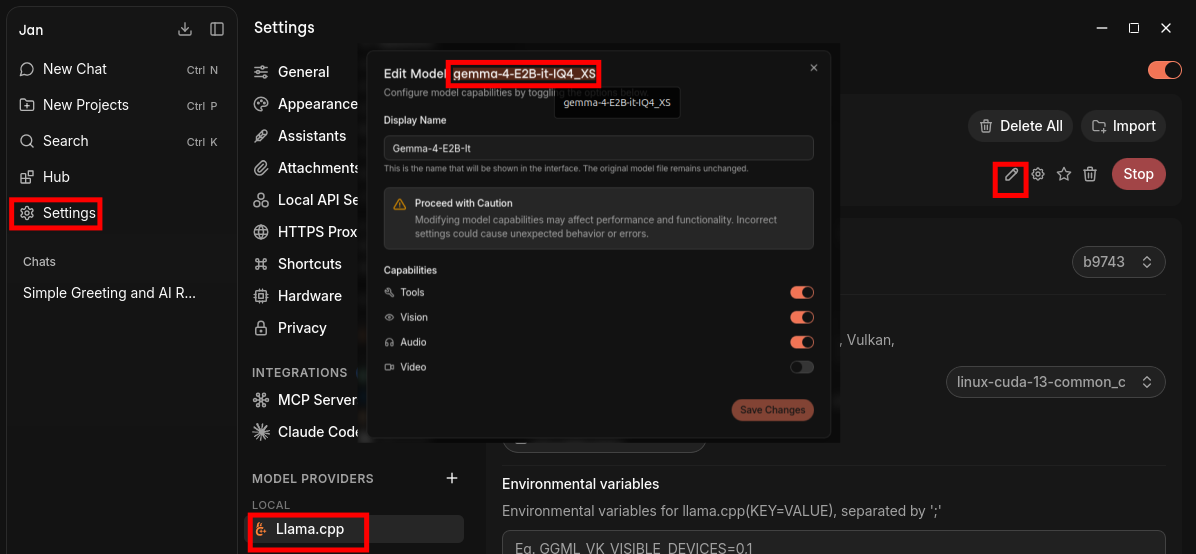
You can copy the id by going to Settings -> Llama.cpp -> Models -> the pen icon.
name: you can give it any name you like
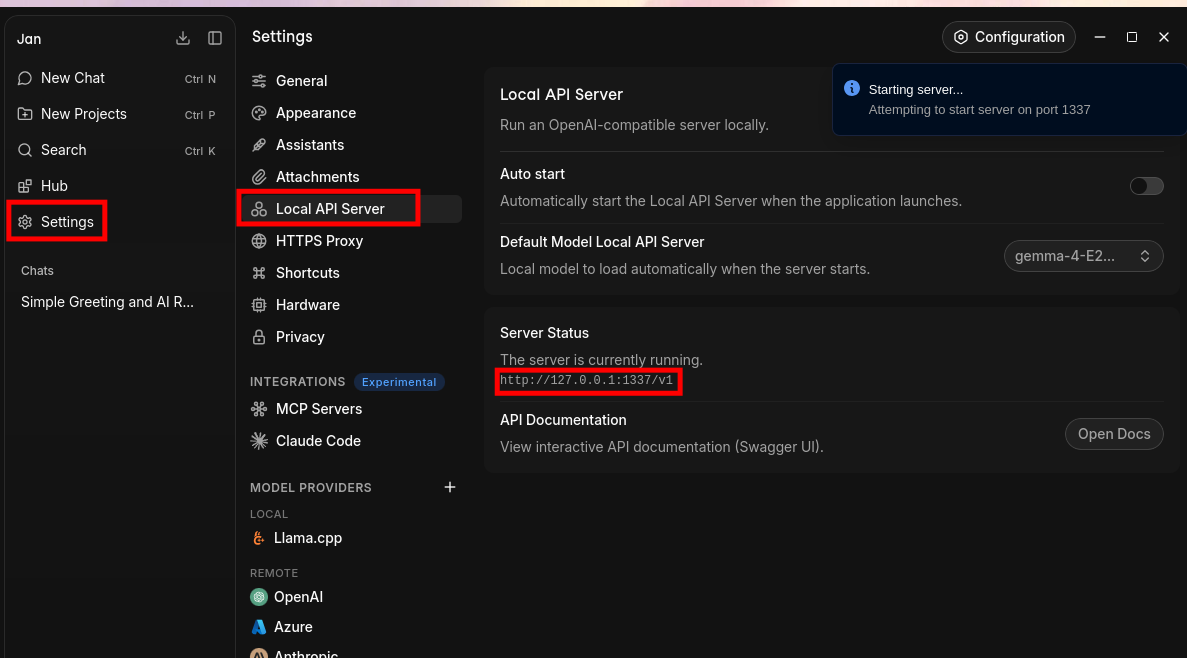
url: Go to Jan -> Settings -> Local API Server -> Server Status and copy the url from there
toolCalling: gemma 4 has tool calling capabilities
vision: gemma 4 has vision capabilities
you can check your model capabilities by going to Jan -> Settings -> Llama.cpp -> Models
maxInputTokens: the context window
maxOutputTokens: the inference reply tokens
Open vscode go to View -> Chat to open up the agent chat window.
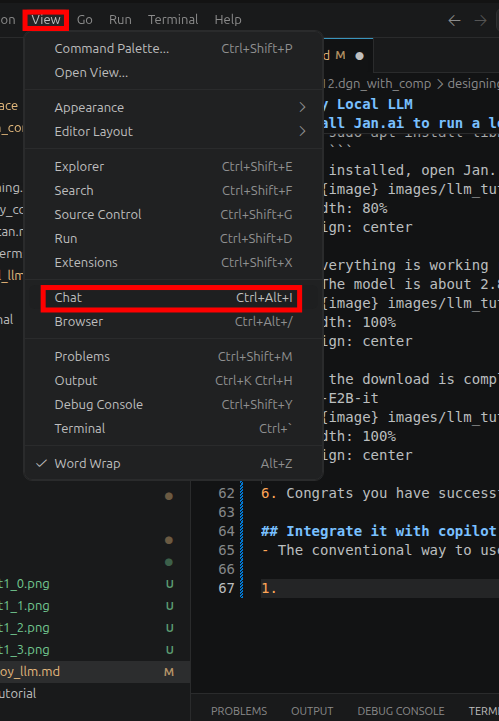
In the chat window choose the Gemma 4 E2B model that you just set up and have a chat. The first chat will take some time to initiate.
You can add context to the chat window and also ask the agent to write codes for you.